Showing posts with label Needs improving. Show all posts

Wednesday, January 28, 2026

Cha Siu Bao

When I was a teenager I attempted making cha siu bao from scratch. It was a full day task and after all that effort they came out terrible. Full of long scallion pieces (which should have been a warning sign in the recipe to me). Baba found the best frozen variety and I never tried again. But it's hard to find a good one here so I decided to try this again, but this time starting with store bought cha siu. Neither of these recipes is perfect, but it's a starting point to try to figure out what to tweak to get it better for next time.

Red House Spice Recipe - ** - 14 buns
27 Jan 2026 - I started with this one because the dough was quick to make. However, the filling was way too goopy. After filling 4 buns, I chopped up a lot more pork and tossed it in. The recipe asked for 130g of cha siu, but it needed about 200 g for the amount of sauce. I ran out of grapeseed oil part way, so subbed in less than 1 T olive oil. I used regular flour instead of cake flour (perhaps the dough would have been better with cake flour). But in the end, the bread was not sweet like I think a cha siu bao should be, so I would not use this dough recipe again. The folds also all disappeared into each other while sitting to rise. The filling tasted too salty, but then when compared to the next recipe, XBD thought this filling was better. My judgement is reserved for when I do a side by side taste test (I put some of each batch in the freezer to compare later). However, I do like that the shallot (which I used instead of onion) was used just to flavor the sauce, but was not kept in.

Woks of Life Recipe - *** - 10 large buns
28 Jan 2026 - This dough was a pleasure to work with, came out much fluffier and cracked closer to a restaurant style one. It was noticeably sweeter than the first recipe (which makes sense since it has 5 T of sugar instead of just 2). The buns came out huge! I would divide into 12-14 next time instead of just 10, just to have a smaller size. I also couldn't fit in all the filling. The filling still came out too salty. Try reducing the salty items (soy, oyster and/or chicken stock?).

Next attempt

- woks of life dough
- no onion/shallot in filling (only use to flavor the sauce)
- less saltiness
- less sauce:pork ratio
- improve flavor - figure out what is missing or too much

Tuesday, November 26, 2024

Gan Bian Si Ji Dou

DBD started liking this dish last year. This is my second attempt at making it. Still needs improving, but ok as is.

  • vegetable oil
  • green beans (400-500 g)
  • salt
  • 115 g pork
  • 1/4 t sichuan peppercorns
  • 3 dried chilis
  • +3 cloves garlic, minced
  • 1 t ginger, minced
  • 1 T shaoxing wine
  • 1 T soy sauce
  • splash dark soy sauce (optional)
  • ~1 t sugar
  1. Wash beans. Break off rough end. Dry thoroughly.
  2. Heat 1 T oil on medium-high in large skillet. Layer beans, without overlap, and fry for 6-8 minutes, flipping every 15-20 seconds. Beans should start to brown and wither. If pan starts to smoke, turn down heat to medium. Move to plate.
  3. Add pork and sichuan peppers to empty pan and cook until surface of pork is cooked.
  4. Add the chilis, garlic and ginger. Stir until aromatic.
  5. Add the beans, and stir for a few seconds.
  6. Add the remaining ingredients (wine, soy(s), sugar). Stir until beans absorb sauce, about 1-2 minutes.
  7. Salt to taste.

Friday, June 7, 2024

Macaroni and Cheese

I made a Mac and cheese with fancy white cheddar and it was awful. I tried a different recipe using the pre-shredded crappy cheddar at the store. It uses an egg instead of flour as a thickener. I used the herbed breadcrumbs and the kids didn't like it. Ate leftovers for a week.

  • 4 c/450 g macaroni
  • 6 T butter, divided
  • 2 eggs, slightly beaten
  • 4 c milk
  • 1 generous t dry mustard
  • 2 t salt
  • pinch of black or cayenne pepper
  • 6 c shredded sharp cheddar
  • 1/2 c fine bread crumbs (1 c was too much)
  1. Preheat oven to 220C/425F. Grease a large casserole dish (~9x13).
  2. Cook macaroni just until al dente. Drain well.
  3. Melt 3 T butter in pot and add pasta. 
  4. Whisk eggs, milk, mustard, salt, and pepper. Add to pasta with cheese. Stir constantly over med-high heat until cheese melts and sauce thickens.
  5. Continue cooking, stirring constantly for 5 min or until very thick and creamy.
  6. Transfer to prepared dish.
  7. Melt 3 T butter in small saucepan and mix with bread crumbs. Sprinkle evenly over top.
  8. Bake 10-15 min.

Wednesday, February 28, 2024

Angel Food Cupcakes

I've been craving angel food cake for a while but I don't have the pan to cook it (nor a reliable oven). I had a bunch of leftover egg whites from making a double batch of empanadas and found a recipe for angel food cupcakes. However, they turned out terrible. My egg whites might not have been enough or improperly whipped, since it only made 4 cupcakes instead of 6 and they turned out incredibly dense. If I ever have leftover whites again I would still want to give it a another try. I also tried using my new food processor to do the whites. It was quite handy, but it was hard to scrape it all out. So perhaps a hand mixer in a bowl would be a better choice. I also didn't have bleached flour.

  • 1/4 c flour, bleached
  • 1.5 t cornstarch (to ensure tender crumb)
  • 1/8 t salt
  • 3 egg whites
  • 1/4 t cream of tartar (to stabilize whites)
  • 5 T sugar
  • 1/2 t vanilla
  1. Preheat oven to 350F. Place 6 paper liners in a muffin tin. Do NOT grease.
  2. In a medium bowl sift the flour, cornstarch and salt. Sift into another bowl back and forth for a total of 3 siftings. 
  3. In a separate bowl, beat egg whites until foamy (~30 sec). Add the cream of tartar and beat until soft peaks form (~2 min). Slowly stream the sugar, 1 T at a time, while beating. The mixture should be bright white and glossy. Add the vanilla and beat to combine.
  4. Add the flour mixture to the whites and fold together. 
  5. Divide the batter into 6 liners. The filling should go to the top of each liner. 
  6. Bake for 17-19 min, until the tops are slightly brown and a toothpick comes out clean
  7. Let cool completely in the pan before moving to a wire rack.

Saturday, November 25, 2023

Chestnut and Mushroom Sticky Rice

Mom taught me how to make this in the early 2000s, I made it immediately after on my own, and then promptly forgot the details. Tried making it again but forgot to buy water chestnuts. Need to figure out how to make this the mom way. First time used part of it as stuffing for turkey and remainder as dressing.

  • 3 rice cups sticky rice (glutinous rice)
  • water, chicken broth
  • 1/2 c peeled, cooked chestnuts
  • 8 dried shiitake
  • water chestnuts: chopped
  • 1 large shallot (6 small shallots), finely sliced
  • 3 t sesame oil
  • 4 T soy sauce
  • 3 T shaoxing wine
  • 1 T oyster sauce
  • 1 t dark soy sauce
  • 1 t salt
  • 1/2 t white pepper
  1. Rinse rice until clear. Soak overnight or at least 4 hours. Drain.
  2. Rehydrate shiitake with boiling water. Squeeze and slice. Save mushroom water.
  3. Heat 1 T oil in pan, saute shiitake and shallots until they turn translucent.
  4. Add in the sauces. Fold in chestnuts. Drizzle with sesame oil and transfer to bowl.
  5. [after this need to see what mom does. the recipe I used didn't have the rice fully cook]
  6. Cook rice (with sauce on top or plain?). 
  7. Douse with broth/mushroom water for additional flavor. Continue cooking (stove/oven) until rice is cooked through.

Sunday, February 13, 2022

Cong You Mian

HM made this for us and it was beyond delicious. I wanted to try my hand at it but it did not come out nearly as well, so I will have to play with it. I used olive oil instead of cooking oil and the noodles were from Amazing Oriental and weren't just flour and water (they had sugar and other ingredients in them). The cong were very big (how does that change the flavor?). Or perhaps I didn't use enough noodles, as they came out very dark. The cong you (scallion oil) flavor was not as strong in mine - perhaps I didn't cook them long enough.

  • 4 T cooking oil
  • 5 stalks scallions, cut into long sections (about 50 g)
  • 2 T soy sauce
  • 2 T dark soy sauce
  • 2 t sugar
  • 400 g dried thin, round noodles
  1. Pour oil in wok. Add white parts of scallions. Simmer over medium low heat until they wrinkle. Add the green part. Continue to cook until they turn brown, about 10 min. Remove scallions.
  2. Add soy sauces and sugar. Cook until the sauce starts to bubble. Remove from heat.
  3. Cook the noodles. Drain and rinse briefly. 
  4. Put noodles in oil and stir to evenly coat. 
  5. Portion out to 4 serving bowls. Top with the fried spring onion and optional cooked vegetables.  

Wednesday, January 26, 2022

White Pickled Daikon

This is a quick pickle of daikon that leaves it white, NOT the luo buo gan recipe that leaves it brown and takes longer to make. I tried a random recipe and it had sugar-vinegar ratio opposite to what I expected. So it came out very sweet. I think it could be adjusted to tone down the sugar and increase the tartness. But it was very easy to make - crunchy and delicious.

  • 1/2 large daikon, peeled (~500 g) 
  • 1/2 c sugar (try reducing this next time)
  • 1 T salt
  • 1 T vinegar (try increasing this next time)
  1. Cut the daikon in quarters lengthwise. Then slice to desired thickness.
  2. Place in a large ziploc and add the remaining ingredients.
  3. Massage for a few minutes.
  4. Transfer to airtight container, like a leftover pasta sauce jar. Keep in fridge for 24 hours minimum. Flavor will continue to develop the longer it sits.

Monday, December 27, 2021

Roast Garlic Bread (with Rosemary)

I didn't have rosemary the first time I made this so it turned out as a delicious garlic bread. The second time I made it was with rosemary but DBD preferred it without. The first time the dough was way too wet - made worse by the oil from the roasted garlic. The second time I put much more flour before adding the garlic...and it was better, but still too wet! The dough was floppy and did not hold it's shape.
  • 1.5 t yeast
  • 1 c warm water
  • 2 t sugar
  • 2 t salt
  • 3 T e.v. olive oil
  • 2.5++ c bread flour
  • [1 T dried rosemary]
  • 1/4 t black pepper
  • 1/2 t oregano
  • 1 head of roasted garlic
  • olive oil, coarse sea salt
  1. Roast garlic well in advance. Roast multiple heads at once for immediate and later use:
    1. Slice a full head of garlic horizontally.
    2. Place both halves on foil, cut side up. Drizzle olive oil generously on cut halves.
    3. Sprinkle each with a pinch of kosher salt (I used regular salt)
    4. Close the halves back together and quickly seal the foil, twisting it to prevent leaks.
    5. Place garlic on baking sheet and roast for 1 hour at 400F/200C or until the garlic is fully soft and aromatic.
    6. Let cool. Open foil and squeeze the cloves out of peel to use. Refrigerate unused cloves for later use in an airtight container.
  2. In a large bowl mix yeast, water, sugar and salt. Let sit for 5-10 min until it foams.
  3. Add in olive oil. Add flour and knead for about 10 min.
  4. Add rosemary, black pepper and oregano. Knead another 5 min. Add in enough flour to have a somewhat stiff dough (you may need to add 1.5 c flour!).
  5. Gently knead in the roasted garlic. The dough could be a bit sticky but manageable.
  6. Place dough in well greased bowl, oiling all surfaces of dough. Tightly cover in cling wrap and let rise until doubled, about 1 hour (maybe up to 2).
  7. Punch down dough.
  8. Shape into rounded loaf.
  9. Using sharp knife, cut criss cross slits on top.
  10. Place on greased baking sheet. Cover with a large bowl. Let rise until doubled, about 1 hour.
  11. Gently brush with olive oil and sprinkle with sea salt (I used regular salt and would have preferred a milder coarser salt), and optionally a bit more rosemary.
  12. Bake at 375/190 for 25-30 min. Splash water on loaf during middle of baking (or bake with tray of water).
  13. Increase temperature to 425 and spray again. Bake until top is a nice golden brown.
  14. Let rest for at least 5 min before slicing.

Thursday, June 25, 2020

Chilled Braised Bamboo

I love the texture of bamboo. I enjoy them chilled as a side dish or in a thai curry. I feel like I could eat 2 cups of it one sitting. I've avoided cooking it for a long time because the canned stuff has such a weird taste that even boiling doesn't get rid of it. But I recently found a source shrink wrapped instead of canned and it doesn't suffer from the weird taste problem. But now I need to find the perfect marinade/braising technique for making it Chinese style. This was my first attempt and good enough to enjoy, but I think it could still use improving. I can't find dark soy sauce anywhere so perhaps this was the missing ingredient.
  • 2 t minced garlic
  • 1 T olive oil
  • bamboo, sliced thin and cut into rectangles
  • 2 T soy sauce
  • [didn't use: 1 t dark soy sauce]
  • 1 t sugar
  • 1/4 t salt
  • 200 ml water
  • 1 t sesame oil
  1. Heat oil in pan and add garlic. Stir and saute for 2-3 min until lightly browned.
  2. Add the bamboo and stir.
  3. Add the soy sauces, sugar and salt. Cook for another 3 min.
  4. Add the water and bring to boil. Reduce heat and cover. Let simmer for 20 min.
  5. Stir in the sesame oil for 1 minute.
  6. Remove from heat and transfer to bowl to cool. Refrigerate and serve chilled. In a rush, eat warm instead.

Recipe #2

  • 2 c water
  • 1/2 c teriyaki marinade
  • 1/4 c sake
  • 1 T soy sauce
  • 2 T dry sherry
  • 1 dry shitaake mushroom

Monday, September 28, 2015

Almond Yeast Bread

Requested by XBD. This was the first attempt. It wasn't quite enough almondy for me, but still enjoyed by everyone. 1.5 lb medium crust loaf, almonds added after beep.
  • 3/4 c milk
  • 2 eggs
  • 1.5 T butter
  • 1.5 t almond
  • 3 T sugar
  • 3/4 t salt
  • 1/2 c almond meal
  • 3 c flour
  • 2 t yeast
  • chopped almonds

Thursday, February 7, 2013

Easy Slow Cooker Meatballs and Sauce

Made this today in a rush - sauce came out tasty but meatballs needed more spices. Served with spaghetti. Could use leftovers to make meatball sandwiches. Worth trying again and adjusting the spices and flavorings. Definitely was easy as it was. Most other recipes require cooking meatballs separately. This is done all in the slow cooker. The risk is a greasier sauce. There was minimal grease in mine - I was able to spoon off some extra liquid/grease from the top.
  • 1.5 lb (extra) lean ground beef
  • 1/4 c parmesan (increase to 1/3)
  • spices: parsley, basil, oregano, thyme, garlic powder, rosemary, coriander, red pepper flakes, salt, pepper, etc
  • 2-4 cloves garlic, minced
  • 1/2 c - 2/3 c breadcrumbs
  • 1 egg, beaten
  • 1 can (28 oz) crushed tomato
  • 1 jar spaghetti sauce
  • 1 T sugar
  • 1 T parmesan* (or more?)
  • more spices* (same as above, generous pinches of everything)
  • optional: diced carrot
  • optional: 1/3 c red wine
  1. Mix beef with parmesan, generous amount of spices, garlic and egg. Add in breadcrumbs until desired consistency.
  2. Pour crushed tomatoes and sauce in 4.5 quart slow cooker. Add in sugar, parmesan and pinches of spices (and optional carrot). Stir.
  3. Divide beef mixture into 16-20 pieces and roll into balls. Place in slow cooker and stir to cover with sauce.
  4. Cook on low 6-8 hours.

Variations

- add in tomato puree to thicken sauce
- add minced onion to meatball mixture
- use homemade sauce instead of store bought
- use mixture of beef, sausage, turkey, etc
- use fattier meat, at the risk of greasier sauce. To counter it, you could prebake the meatballs at 350 F...but then it wouldn't really be an "easy" slow cooker recipe anymore.
- make meatballs night before, then throw in sauce ingredients next day to cook.

Wednesday, March 16, 2011

Belgian Rice Milk Waffles

used recipe in waffle iron booklet but subbed rice milk for regular and reduced oil by 1 T. First one came out too crisp, cooked remainder for less time (3.5-4 minutes) which helped. need to see if using milk makes it softer...
  • 1 c flour
  • 3 t powder
  • 1/4 t salt
  • 1 T sugar
  • 3 eggs, separated
  • 1 c rice milk
  • 3 T oil
  • 1 t vanilla (next time don't use this - tastes like a fortune cookie!)
  1. In a large bowl, combine flour, powder, salt and sugar.
  2. Beat egg whites until stiff.
  3. Add yolks and milk to flour mixture.
  4. Stir in oil and vanilla.
  5. Fold in whites.
  6. Cook in waffle iron 4 minutes.

Tuesday, September 28, 2010

Slow Cooker: Beef Stew

Didn't have canned tomatoes so substituted some cheap tomato paste. Didn't taste so great - needed to cover it up with salt. Was also missing basil and thyme so used coriander and tarragon instead. Could be better with more flavor, better quality beef, etc. Makes 6-8 servings.
  • 3 carrots, cut into 1/2-1" pieces
  • 3 medium potatoes, peeled and chopped 1/2" pieces
  • 1 small onion, chopped
  • 3-6 cloves garlic, chopped
  • 1 bay leaf
  • 1.5 T Worcestershire sauce
  • 3/4 t tarragon
  • 3/4 t coriander
  • 1/2 t black pepper
  • package of lean beef stew, cut into 1" pieces (1-2 pounds)
  • 14 oz diced tomatoes, undrained (used 10 oz tomato paste and one large freshly diced tomato instead)
  • 14 oz water + bouillon cube
  • 1/8-1/4 c potato flour (or corn starch) (or 1/4 c regular flour if you don't need gluten-free)
  • 1/2 c cold water
  1. Layer ingredients in order from carrots down to water and bouillon.
  2. Cover and cook on LOW 8-10 hours
  3. Remove beef and vegetables to large serving bowl. Cover and keep warm.
  4. Discard the bay leaf.
  5. Turn slow cooker to HIGH and cover.
  6. Mix flour/starch and water in a small bowl. Add 1/2 c cooking liquid. mix well. Stir mixture into slow cooker. Cover and cook for 15 minutes or until thickened.
  7. Pour sauce over beef and serve immediately.
Notes
Next time use better beef (was sale package from No Frills), use basil and thyme, use diced tomatoes instead of paste
Used cornstarch but did not thicken well. Next time just use potato starch.

Beef Stew II

Tried another version using some antibiotic-free and hormone-free beef. Still lacking in flavor. I wonder if it needs more spices due to the beef stock being rather plain. Or if it's because I don't add onions to anything anymore. ***
  • 2 lbs stewing beef
  • 3 red potatoes, diced
  • 3 large carrots, chopped
  • 1/4 full stalk celery, chopped
  • 1/4 c flour
  • 1/2 t salt
  • 1/3 t black pepper
  • 2 heaping t minced garlic
  • 1 bay leaf
  • 1 t paprika
  • 1 t Worcestershire sauce
  • 1.5 c beef broth
  • frozen peas
  1. Place beef in bottom of slow cooker.
  2. Mix flour, salt and pepper. Pour over beef and stir to coat.
  3. Add in remaining ingredients, up to broth.
  4. Cook on low 10-12 hours or high 4-6 hours.
  5. About 5-10 minutes before serving add in peas.

Sunday, September 19, 2010

Applesauce Banana Bars

Ran out of applesauce so used a banana to supplement. Based on a recipe from allrecipes.com.  They came out a little too sweet for my taste, so I would reduce the sugar next time - maybe by half. 4 stars for how quick it was to throw together, only 3 stars for taste.
  • 1/4 c butter, softened
  • 2/3 c brown sugar (reduce this next time, maybe in half?)
  • 1 egg
  • 1/2 c applesauce
  • 1 banana, mashed
  • 1 c flour
  • 1 t soda
  • 1/2 t salt
  • 1/2 t cinnamon
  • 1/4 t nutmeg
  • 1/4 t ginger
  • 1/8 t cloves
  1. Grease a 9x13 baking dish. Preheat oven to 350F.
  2. Mix the butter, sugar and egg until smooth. Add the applesauce.
  3. In a separate bowl, combine the flour, soda, salt and spices. Stir into the wet mixture.
  4. Spread evenly in pan.
  5. Bake for 25-30 minutes or until edges are golden. 
  6. Cool in pan. Cut into squares/rectangles. 
Variations
  • Throw in raisins
  • add chopped apple

Monday, September 13, 2010

Gluten Free Pizza

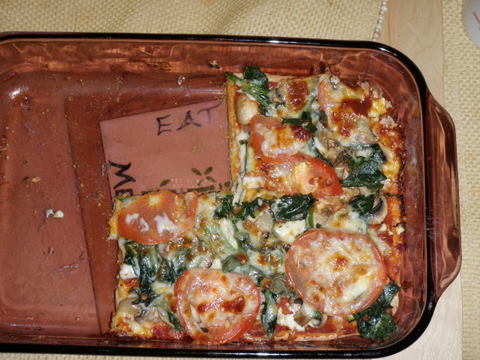
Made some pizzas for M's birthday. Experimented with two recipes. First one rose way too much and came out with a thick airy crust. Second one didn't rise at all and came out as a thin crust (more like New York style) and tasted more "pizza-like". If to make again would reduce sugar in first recipe or increase in second. Would like somewhere in the middle. Or maybe more flour to the first recipe as it was very wet.

GF Pizza Dough 1

  • 1/4 c millet flour
  • 3/4 c white rice flour (or use a mixture of brown rice and white rice flour)
  • 1/4 c glutinous rice flour
  • 1/4 c cornstarch (or tapioca flour or arrowroot starch)
  • 1/2 c tapioca flour
  • 2 t xanthan gum
  • 3/4 t salt
  • 1 1/2 T sugar (note: would reduce this next time)
  • 1 t sugar for proofing yeast
  • 2 1/2 t active dry yeast
  • 3/4 c warm water, (heated to 115 -120 degrees)
  • 2 T cottage cheese (or ricotta cheese)
  • 2 eggs
  • 2 1/2 T olive oil
  • 1/2 t red wine vinegar or apple cider vinegar
  • 1 T sugar (or honey)
  • 1 t garlic powder
  • 1/2 t italian seasoning
  1. Optional: Preheat oven to 170F.
  2. Mix olive oil, cottage cheese, sugar and vinegar in a small bowl. Set aside to come to room temperature.
  3. Combine dry ingredients in a large bowl.
  4. Heat 1 c of water until it reaches 115-120F.
  5. In small bowl, place yeast and 1 t sugar. Add 1/4 c of the heated water. Stir and let sit for a few minutes.
  6. With everything at room temperature, add eggs AND cheese mixture to the dry ingredients.
  7. Add the yeast mixture.
  8. Gradually add 1/2 c warm water. Dough should look like stiff cake batter. The dough should still hold swirls as you mix, but should be shiny and not dull. Add the rest of the water slowly until the right consistency is achieved.
  9. If you have parchment paper, line the baking pan with it. Grease with olive oil. Spread the dough into a 12-13 inch circle or into a 9x13 glass dish. Create high edge. Cover hands with olive oil to prevent sticking (dough will be very sticky).
  10. Optional: Turn oven heat off and let rise for 40 minutes in warmed oven.
  11. Bake at 375F for 10 minutes.
  12. Add toppings.
  13. Bake at 400F for 7-12 min until toppings are cooked (cheese should be melted and browned to preference). 


GF Pizza Dough 2 
This one was much easier to make.
  • 1 T yeast
  • 1 1/3 c milk
  • 1 t sugar
  • 1 1/3 c brown rice flour
  • 1 c cornstarch
  • 2 t xanthan gum
  • 1 t salt
  • 1/2 t garlic powder
  • 1/2 t italian seasoning
  • 2 t olive oil
  • 2 t apple cider vinegar
  1. Preheat the oven to 400 degrees.
  2. Heat the milk in the microwave so that it is warm (not so hot that it would burn your finger, just warm). Combine the milk with the sugar and yeast in a small mixing bowl. Let sit a few minutes.
  3. Combine the brown rice flour, cornstarch, xanthan gum and spices in a larger mixing bowl. 
  4. Add the oil and vinegar to the yeast mixture. Then pour all of that into the flour mixture and stir well.
  5. Once you’ve done this, the dough will be somewhat sticky, and now is a good time to sprinkle some extra rice flour on it. Now that the rice flour is cutting down on the stickiness, form the dough into a ball and let it sit while you get your pans ready.
  6. If you’re using pans or a cookie sheet to cook the crusts, you will need to grease them, so that the pizza crust does not stick. Spread butter or olive oil on the pan and then sprinkle a bit of rice flour on top of that. Use an 8x8 dish and a circular pan (or what have you). 
  7. Split the ball of dough into two pieces – one for each pan. Starting from the middle of the dough, use your fingers to press down on the dough and spread it out towards the edges of the pan. When you get the dough to the edges, continue to push the dough up onto the side of the pan, so that you will have a nice crust.
  8. Prebake the crusts for 8 minutes. 
  9. Drizzle some olive oil onto your crusts and spread it over them evenly. (This will keep the pizza sauce from making your crust soggy.). Add the toppings. 
  10. Bake the pizza for 15 min or until cheese is browned slightly. 
  11. Cut and serve.
GF Pizza Dough 3
10/31/2010 Tried combining the above two to get best of both worlds while limited to flours on hand...had a crispy crust, but texture of dough could still be improved.

  • 1 T yeast
  • 1 1/3 c milk, warm
  • 1 T sugar
  • Flour: 1 c rice flour, 1/8 c soy flour, 1/4 c millet flour, 1/4 c glutinous rice flour
  • Starch : 3/4 c tapioca flour, 1/4 c potato starch
  • 2 t xanthan gum
  • 3/4 t salt
  • heaping 1/2 t garlic powder
  • 1/2 t oregano
  • 2 t olive oil
  • 2 t apple cider vinegar
  • 1 egg 
Notes

For regular pizza dough or topping ideas, see the gluten-full recipe.

    Thursday, April 8, 2010

    Black Sesame (Cocoa) Muffins

    Elisa bought a massive bag of powdered black sesame and shared it with me. So I gave a go at some black sesame muffins. I wasn't sure how they'd turn out, so I split the batter and added cocoa to half. I really like how the black sesame muffins look - browned on the outside, like a normal muffin, but they are white with black specks on the inside. The cocoa overpowers the black sesame as well as covers up the speckled design. I might try adding vanilla or almond extract next time. Or maybe a filling of black sesame paste in the middle to give it a little extra oomph in the flavor department.
    •  1.5 c flour
    • 1/2 c black sesame powder
    • 1/3 c sugar
    • 3 t baking powder
    • 1/4 t baking soda
    • 1/4 t salt
    • optional: up to 1/4 c cocoa 
    • 3/4 c yogurt
    • 4 T butter, melted
    • 2 eggs
    • [next time: vanilla or almond extract]
    • optional: milk
    1. Mix the dry ingredients together in a large bowl.
    2. In a medium bowl, mix the wet ingredients.
    3. Add the wet ingredients to the dry and stir until just mixed. If too thick, add a little milk.
    4. Spoon into 12 greased muffin cups and bake for 20 min at 200C.

      Notes
      I split the dry ingredients in half and added 1/4 c cocoa to one half. This was a bit much so next time only 1/8 c (or 1/4 c for the whole batch). The batter was too thick. I left the plain black sesame as was but milked down the cocoa ones by a few T. The cocoa ones rose better than the black sesame. I used some old Ticino yogurt (plain, solid). CT couldn't taste the black sesame.

      Wednesday, March 10, 2010

      Vegetarian Chili

      I was too lazy to go to the store to get beef, so I made a vegetarian version of Easy Chili - just adding garlic, cumin and carrot to give it a little extra oomph.
      • 1/2 large onion, chopped
      • 5 cloves garlic, chopped
      • 1 yellow pepper, seeded and chopped
      • olive oil
      • 1 large carrot, diced
      • 1/2 T Chinese chili powder
      • 1/2 T cayenne pepper
      • 1/2 T cumin
      • 1 can dark red kidney beans, drained and rinsed
      • 1 28 oz can whole tomatoes, diced (with liquid)
      • 6 oz tomato paste
      1. Heat oil in a pan and cook the onion, bell pepper and garlic.
      2. Add the carrot.
      3. Add spices.
      4. Add the beans, tomatoes, and paste. Bring to a boil and then reduce heat to low and cook for one hour.
      Variations
      Add other vegetables like mushrooms, cabbage, or zucchini.
      Substitute pinto beans for kidney beans.

      Notes
      3/10/10 Served with freshly baked bread rolls.

      Saturday, February 6, 2010

      Mini Baked Custards

      This recipe is based on one from one of my favorite cookbooks, Going Solo in the Kitchen. The book is catered to those cooking for one - so has smaller amounts for just one or two people. This one came out closer to how I remember making it as a kid - though I think my ramekins are a bit bigger than what the recipe calls for, so mine ended up shallower. May need to double or 1.5x the recipe for next time.
      • 2 eggs
      • 2-3 T sugar
      • dash of salt
      • 3/4 c hot milk
      • 1/4 t vanilla
      • nutmeg
      • boiling water
      1. Beat the eggs, sugar and salt together until well combined, about 1 min.
      2. Pour the hot milk in slowly, mixing constantly.
      3. Add the vanilla.
      4. Pour the custard through a sieve into 2 custard cups.
      5. Sprinkle the surface with nutmeg.
      6. Places the cups in an 8x8 dish and pour boiling water to halfway up their sides.
      7. Bake at 180C until edges are firm. (Recipe calls for 25-30 min, but mine took 50 min).
      8. Immediately remove from water bath and place on rack to cool.
      9. Refrigerate.

      Thursday, January 7, 2010

      Jaffle Waffles

      What do you get when you combine an Australian and an American? Well, I'll give you a clue: one loves jaffle irons and the other loves waffles. Lo and behold waffles made in a jaffle iron. Best of both worlds now. Woo hoo! Comes out in single serving triangle shapes.
      • 2 c flour
      • 4 t powder
      • 1 t salt
      • 3 T sugar
      • 2 eggs, separated
      • 1.5 c milk, warm
      • 1/3 c butter, melted
      • 1 t vanilla - optional
      1. Combine dry ingredients in a large bowl.
      2. Combine egg yolks with milk, butter and vanilla. Add to dry mixture.
      3. Beat egg whites until frothy. Gently fold into mixture.
      4. Spoon into jaffle iron. Cook until nicely browned (lots of steam will come out). It takes longer than a waffle iron but works.
      5. Serve fresh from the iron, plain, with fresh fruit, or maple syrup.
      Notes
      • Made 16 jwaffles.
      • The waffle batter needs work - it tasted a little too eggy for me.
      • Never heard of a jaffle iron? Most Americans haven't - it's like a panini machine except shaped to a sandwich and cut in triangles. The machine clamps the edges shut and the pockets hold filling.
      • The vanilla makes it taste more like a fortune cookie - a bad thing in my opinion.


      Jwaffles, Take II
      • 2 c flour
      • 2 t powder
      • 2 T sugar
      • 1/2 t salt
      • 2 eggs, separated
      • optional: lemon peel
      • 2 c milk
      • 6 T butter, melted *
      1. In a medium bowl, combine flour, powder, sugar and salt.
      2. Combine egg yolks and milk (and lemon peel).
      3. Add dry ingredients to milk mixture.
      4. Fold in butter.
      5. Beat egg whites until frothy. Fold into batter.
      6. Cook in jaffle iron.
      Notes
      • 6 T was too much buter
      • lemon peel - I made 8 jwaffles without then added 1 T at the end. Nice scent - but not sure I like the flavor. Better than vanilla though.
      • Overall, this was a better recipe for texture because it came out fluffier (I truly made the whites frothy this time with an electric whisk, as opposed to using chopsticks before). However, too oily. So still needs some tweaking.

      Friday, December 18, 2009

      Chocolate Mint surprise muffins

      Modified a recipe for chocolate muffins to put a mint spin on them. Used a free candy cane from school (a mini peppermint one) and 2 kinds of Andes mints. Would have liked more peppermint but only had the one cane. Next time peppermint extract or more candy canes. Tasted delicious hot out of the oven - with the center coming out nice and gooey. Will see how they taste tomorrow in the cold. Original is on AllRecipes. Modified version below (with notes in parentheses).
      • 2 c flour
      • 2/3 c cocoa powder (increased)
      • 1 c sugar (reduced)
      • 1/2 t soda
      • 2 t powder
      • 1/2 t salt (increased)
      • 1.5 c milk (increased)
      • 1-3 candy canes, mini (added) [or mint extract]
      • 1 egg
      • 3 T vegetable oil (increased)
      • 1 t vanilla
      • 1 c chocolate pieces (semi-sweet morsels, Andes thin mints)
      • 12 Andes thin mints, mint on the outside (added)
      1. Dissolve candy cane(s) in milk.
      2. Combine flour, cocoa, sugar, soda, powder and salt in a medium sized bowl.
      3. Combine milk, egg, oil and vanilla in a large bowl.
      4. Add dry ingredients to wet. Do not overmix.
      5. Add in 1 c of chocolate pieces.
      6. Fill muffin cups 3/4 full with batter. Place green Andes on top. Cover with remaining batter.
      7. Bake for 20-25 minutes at 180C or until done. In a small oven, be sure to rotate muffin tray.
      Notes
      Next time, either more peppermint sticks or peppermint extract to replace the vanilla. All Andes mints instead of half chocolate chips. Rotate muffin tray.