Showing posts with label bake. Show all posts

Friday, March 13, 2026

Roasted Cauliflower

Tried this with the garlic powder and next time would like to try it without (for my allium sensitivity, not that it didn't taste delicious).

  • 1 head of cauliflower
  • 2 T olive oil
  • 3 T butter, melted (original was only 2 T but I had a big head of cauliflower)
  • [1/2 t garlic powder]
  • 1/2 t salt
  • 1/4 t paprika
  • 1/4 t pepper
  1. Preheat oven to 200C.
  2. Line baking sheet with parchment paper.
  3. Break off cauliflower into pieces, slicing the larger ones in half if necessary to make them fairly even and bite-sized.
  4. Place on sheet and drizzle with oil and butter. Toss to combine.
  5. Combine the seasoning and then sprinkle on. Toss again.
  6. Spread evenly and bake at 200C convection (or 425F regular) for 15-20 min until desired tenderness/crispiness.

Wednesday, January 8, 2025

Buttermilk Biscuits

The freezer trick works really great. Kids loved them.

  • 1 c buttermilk/karne melk (or 1 T lemon juice plus remainder lactose free milk) 
  • 8 T butter (113 g = 1/2 c)
  • 2 c flour
  • 1 T sugar
  • 1/2 t baking soda 
  • 2 t baking powder
  • 3/4 t salt 
  1. Preheat oven to 450F/230C.
  2. Line baking sheet with parchment paper. 
  3. Place buttermilk in freezer for 10 min while preparing other ingredients.
  4. Microwave butter, covered, for 30 seconds and then 10 sec increments until melted.
  5. Whisk dry ingredients in large bowl.
  6. Pour butter into chilled milk and stir. Butter will solidify into small pieces.
  7. Add buttermilk mixture to bowl and stir until flour is incorporated and dough pulls away from side of bowl. Dough should be stiff (not wet).
  8. Knead 5-6 times on generously floured counter. Flip and then shape into 6" square, 1.5-2" height. 
  9. Cut 8 biscuit shapes (2.5" round or free form). Place on parchment paper.
  10. Bake until tops are golden brown and crisp, 8-18 min.
  11. Optional: brush tips with 1 T melted butter

Related

Friday, November 22, 2024

Mini Brownie Cheesecakes

These were easy small servings for a party. Big hit with everyone, but I'd rather just a brownie or just a cheesecake. Would still try again to be sure. Makes 12 muffin size treats. Used Mon Chou cream cheese blocks, 100 g each.

  • BROWNIE LAYER
  • 1/4 c butter (56 g)
  • 1/4 c bittersweet chocolate chips (I used semi-sweet and reduced sugar) (1.5 oz)
  • 1/2 c sugar (100 g)
  • 1 egg
  • 1/2 t vanilla
  • pinch of salt
  • 1/3 c flour
  • CHEESECAKE LAYER
  • 16 oz/455 g cream cheese, softened to room temp
  • 1 egg
  • 1/3 c sugar
  • 1 t vanilla
  1. Melt chocolate and butter in small saucepan, stirring until smooth.
  2. Remove from heat and add 1/2 c sugar.
  3. Add egg and 1/2 t vanilla. Stir until smooth.
  4. Fold in salt and flour.
  5. Line muffin tin with paper liners. Divide brownie batter evenly between cups.
  6. Bake 350F until brownies are just about set, about 10 min.
  7. Beat cream cheese, egg, 1/3 c sugar, and 1 t vanilla until smooth.
  8. Spoon over brownie bottoms.
  9. Bake 350F until tops appear dry and centers barely jiggle when shaken, about 12-15 min.
  10. Let cups cool slowly and completely, about 1 hour at room temp. Chill in fridge to firm up.

Saturday, June 15, 2024

Single Layer Cake

A double layer cake leaves too much leftover so I found this recipe for a simple single layer. Made on 6/12 and 6/15. The first time I used fine patentbloem and the second time I used Amerikaanse tarwebloem.

  • 250 g flour (about 2 c, depending on type)
  • 1 T baking powder
  • 1/4 t salt
  • 113 g butter, room temp
  • 65 g grapeseed oil
  • 215 sugar
  • 1 egg + 2 egg whites, room temp
  • 1 T vanilla
  • 200 ml karnemelk (buttermilk) 
  1. Generously butter a 9" cake pan and coat with sugar.
  2. Combine flour, baking powder and salt in a small bowl.
  3. Beat butter, oil and sugar for 5 min.
  4. Beat in eggs one at a time. With the last egg, add the vanilla.
  5. Alternate folding flour and buttermilk starting with 1/3 of the flour mixture, then 1/2 of the buttermilk. Only fold until flour is incorporated, and no more!
  6. Pour into prepared pan and bake for 45-50 min or until a toothpick comes clean.
  7. Let cool for 10-15 min. Flip onto plate to finish cooling.
  8. Top with whipped cream and fruit.
  • 350 ml slagroom/whipping cream
  • pinch salt
  • 1/6 c sugar (1/4 c was too sweet)
  • 1 t vanilla
Related

Friday, June 7, 2024

Macaroni and Cheese

I made a Mac and cheese with fancy white cheddar and it was awful. I tried a different recipe using the pre-shredded crappy cheddar at the store. It uses an egg instead of flour as a thickener. I used the herbed breadcrumbs and the kids didn't like it. Ate leftovers for a week.

  • 4 c/450 g macaroni
  • 6 T butter, divided
  • 2 eggs, slightly beaten
  • 4 c milk
  • 1 generous t dry mustard
  • 2 t salt
  • pinch of black or cayenne pepper
  • 6 c shredded sharp cheddar
  • 1/2 c fine bread crumbs (1 c was too much)
  1. Preheat oven to 220C/425F. Grease a large casserole dish (~9x13).
  2. Cook macaroni just until al dente. Drain well.
  3. Melt 3 T butter in pot and add pasta. 
  4. Whisk eggs, milk, mustard, salt, and pepper. Add to pasta with cheese. Stir constantly over med-high heat until cheese melts and sauce thickens.
  5. Continue cooking, stirring constantly for 5 min or until very thick and creamy.
  6. Transfer to prepared dish.
  7. Melt 3 T butter in small saucepan and mix with bread crumbs. Sprinkle evenly over top.
  8. Bake 10-15 min.

Thursday, May 23, 2024

Garlic Fingers with Donair Sauce

I needed a Canadian recipe for an International Festival so found this Nova Scotia snack, that east coasters know about. Easy filler, but better served warm from the oven.

  • pizza dough
  • garlic powder or minced garlic
  • butter
  • black pepper
  • oregano
  • 4 c mozzarella, shredded
  • optional: 1 c parmesan, grated
  • Sauce
    • 1 can sweetened condensed milk (14 oz), 1 T garlic powder, 6 T white vinegar
    • 300 g sweetened condensed milk, 1/4 c vinegar, garlic powder to taste (at least 1/4 t)
  1. Sauce: Mix all in a closable container. Don't overmix. Just incorporate everything and let it rest. Let it sit in the fridge until ready to use. Mix and use as dip.
  2. Fingers: Spread dough in 2 pans. Cover with seasoned garlic-butter mixture. Top with cheese. Bake 425F for 20-25 min or until cheese is melted, bubbly and light brown. Cut into fingers (thin slices)

Monday, January 29, 2024

Coconut Buns

This is another great recipe from The Joys of Baking. I use maple syrup instead of the golden syrup called for (not an ingredient available here) in the filling and always skip the sweet wash. It bakes up beautifully and tastes great.  

9/13/22


9/15/22
5/16/23 Egg white wash (looks better with whole egg)
1/29/24 Forgot the maple syrup in the filling until over halfway through stuffing. Added a squeeze to remainder of filling and they all still tasted good. Also ran out of coconut oil so substituted butter for greasing the pan and sunflower oil in the bread.

Wednesday, September 13, 2023

Almond Sponge Roll

The lemon sponge roll was too sweet so I decided to use a custard filling instead. The old sponge recipe also had leftover whites, so I found a recipe that was the same number of whites+yolks. Unfortunately I ran out of vanilla, so I substituted almond extract. A bit too much. It was still edible for me but DBD thought it was too strong. XBD gobbled it up. DBD has requested it with vanilla custard next time.

  • 4 eggs (split into yolks and whites)
  • 1/2c + 1/4 c sugar (reduce next time)
  • 3/4 c cake flour
  • 3/4 t baking powder
  • 1/2 t salt
  • 1/4 t cream of tartar
  • powdered sugar
  • favorite filling: lemon curd, vanilla custard, etc
  1. In a small bowl, combine flour, powder and salt.
  2. In a separate bowl, whisk egg yolks for 1 minute on medium high.
  3. Gradually add 1/2 c sugar until mixture is pale, about 2-3 min.
  4. On low speed, add the flour mixture.
  5. In a mixing bowl, beat the egg whites and cream of tartar on low medium until frothy.
  6. Add 1/4 c sugar a bit at a time until the whites are medium stiff (not dry).
  7. Fold ~1 cup of the whites into the batter. Fold in the rest.
  8. Spread evenly in parchment lined and buttered edged 10x15 (or smaller) cookie sheet. 
  9. Bake 375F for 10-15 min. (Lower heat with convection)
  10. Let rest a few minutes. Sprinkle with powdered sugar. Place clean tea towel on top and flip onto towel. While cake is still warm, roll up the sponge sheet (with the towel inside the roll). Let rest 30 min or more to cool on counter.
  11. Unroll and spread favorite filling and re-roll without any air bubbles but not too tight (no squishing the cake). Slice and serve. 

Thursday, August 24, 2023

Thai Chicken Meatball Noodle Soup

Tried a new recipe for MM's bday, hoping the meatballs would be appreciated by BDs (possibly eaten with rice). Adults liked it for its fresh and different flavor profile. XBD claimed it was ok to make once a year. Inspired by a Grumpy Chef.

  • 1 lb ground chicken
  • 1 egg, beaten
  • 1/2 c plain bread crumbs
  • 2 t soy sauce (low sodium preferred)
  • 1.5 t finely grated fresh ginger
  • 2 green onions, chopped
  • 2 cl garlic, finely chopped
  • 1/4 t crushed red pepper flakes (did not have)
  • 1 T olive oil
  • 2 T red curry paste (or more to taste)
  • 3/4 c sliced red onion
  • 3 c chicken stock
  • 1 c full fat coconut milk (14 oz)
  • 1.5 c sliced bok choy
  • 1/4 c chopped cilantro
  • 3 T fish sauce
  • 2 t honey
  • salt + pepper
  • 1 pkg dried rice noodles (8 oz)
  • 4 wedges fresh lime (forgot)
  1. Preheat oven to 375F/190C. Lined rimmed baking sheet with parchment paper.
  2. Combine ground chicken, bread crumbs, egg, soy, ginger, green onions, garlic and red pepper flakes. Shape into 1 inch balls (about 2 t) and place on lined baking sheet.
  3. Bake until no longer pink in center, about 12 min. Remove from oven and set aside.
  4. Heat olive oil in large pot over medium heat and add curry paste. Cook until fragrant 1-2 min. 
  5. Add red onion, ~2 min.
  6. Add chicken stock, coconut milk, bok choy, cilantro, fish sauce, and honey. Stir until combined. Bring to boil.
  7. Reduce heat to medium and add meatballs (can set some aside for picky eaters). Simmer until heated through, ~6-8 min.
  8. Season with salt and pepper.
  9. Place rice noodles in large bowl and cover with boiling water. Set aside until softened, ~15 min. Drain well. 
  10. Divide noodles among bowls. Ladle soup and meatballs on top. Serve with fresh lime.

Thursday, August 17, 2023

Pastitsio

I took a trip to Athens and discovered Greek moussaka, which was different from Serbian moussaka earlier in the summer. But I was more impressed with a pasta bake called pastitsio, which is similar, but with pasta instead of potatoes, and no eggplant. It is hard to find the ingredients here so I substituted lots of items and the kids enjoyed it enough. They still aren't a fan of the cheese but they really enjoyed the rest of it. Later I found the correct pasta shape in my local grocery store. I couldn't monitor it while baking so it came out over cooked on the top but still tasting great. I also couldn't fit everything in the dish I used, so left out half the sauce. Since the kids aren't a fan, I've cut the sauce amount below in half.

  • 400 g Greek bucatini (sustitute Italian bucatini, ziti, penne, macaroni)
  • 120g feta, crumbled
  • 2 egg whites
Meat Sauce
  • 2 T olive oil
  • 3 garlic cloves, minced
  • 1 red onions, finely chopped (or substitute yellow or brown onions)
  • 1 kg ground beef
  • 3/4 c red wine
  • 800 g (28 oz) canned crushed tomato
  • 2 beef bouillon cubes, crumbled
  • 2 T tomato paste
  • 1 t sugar
  • 1 bay leaf
  • 1/2 t cinnamon powder
  • 1 cinnamon stick (or extra 1/2 t powder)
  • 1/4 t ground cloves
  • 3/4 t salt
  • 1 t pepper
Greek Bechamel (halved)
  • 50 g (3.5 T) butter
  • 3/8 c flour
  • 2 c milk
  • 1/16 t nutmeg
  • 1/4 t salt
  • 50 g Kefalotyri Greek cheese (or substitute Romano or Parmesan), finely shredded
  • 1 egg yolk
Topping: 75 g Kefalotyri Greek cheese (or sub Parmesan, Romano), finely grated
  1. Meat Sauce
    1. Heat oil in large pot over high heat. Add garlic and onion, cook for 2-3 min, until onion is softened.
    2. Add beef and cook, breaking it up until it turns brown.
    3. Add wine and cook until it is mostly evaporated, ~3 min.
    4. Add remaining meat sauce ingredients. Stir, bring to simmer, then reduce heat to medium-low so it simmers gently. Cook for 45min-1hr until liquid is almost gone, stirring occasionally. It should be a thick mixture with little liquid.
    5. Remove from stove and cool for at least 30 min (to room temperature ok).
  2. Greek Bechamel
    1. Melt butter in large saucepan over medium heat. 
    2. Add flour and stir 1 min.
    3. While stirring, pour in half the milk. It should turn into wet paste. While stirring, pour in remaining milk. The lump should easily dissolve until it's lump free. Whisk vigorously.
    4. Cook for 5 min, stirring so the base doesn't stick. It should be thick enough to coat the back of a wooden spoon and you can draw a path across it with your finger.
    5. Remove from stove. Stir in nutmeg, cheese and salt.
    6. Let cool for 5 min.
    7. Whisk in egg yolk quickly. Cover and set aside. If sauce gets to thick to pour, just reheat on low until pourable.
  3. Pasta
    1. Cook the package according to instructions, MINUS 1 min.
    2. Drain, return to pot. Let cool 3 min.
    3. Stir in egg whites. (Do this just before assembly so they don't dry out. This helps the pasta set better to get neat slices)
    4. Gently stir in feta.
  4. Assemble and bake
    1. Preheat overn to 180C/350F.
    2. Place pasta in 9x13 tall baking dish. Arrange bucatini so they are going in the same direction.
    3. Top with meat sauce and smooth surface.
    4. Pour bechamel over.
    5. Sprinkle with cheese.
    6. Bake 30 min or until crust turns golden.
    7. Cool for 10 min before serving.

Sunday, March 12, 2023

Aussie Meat Pie

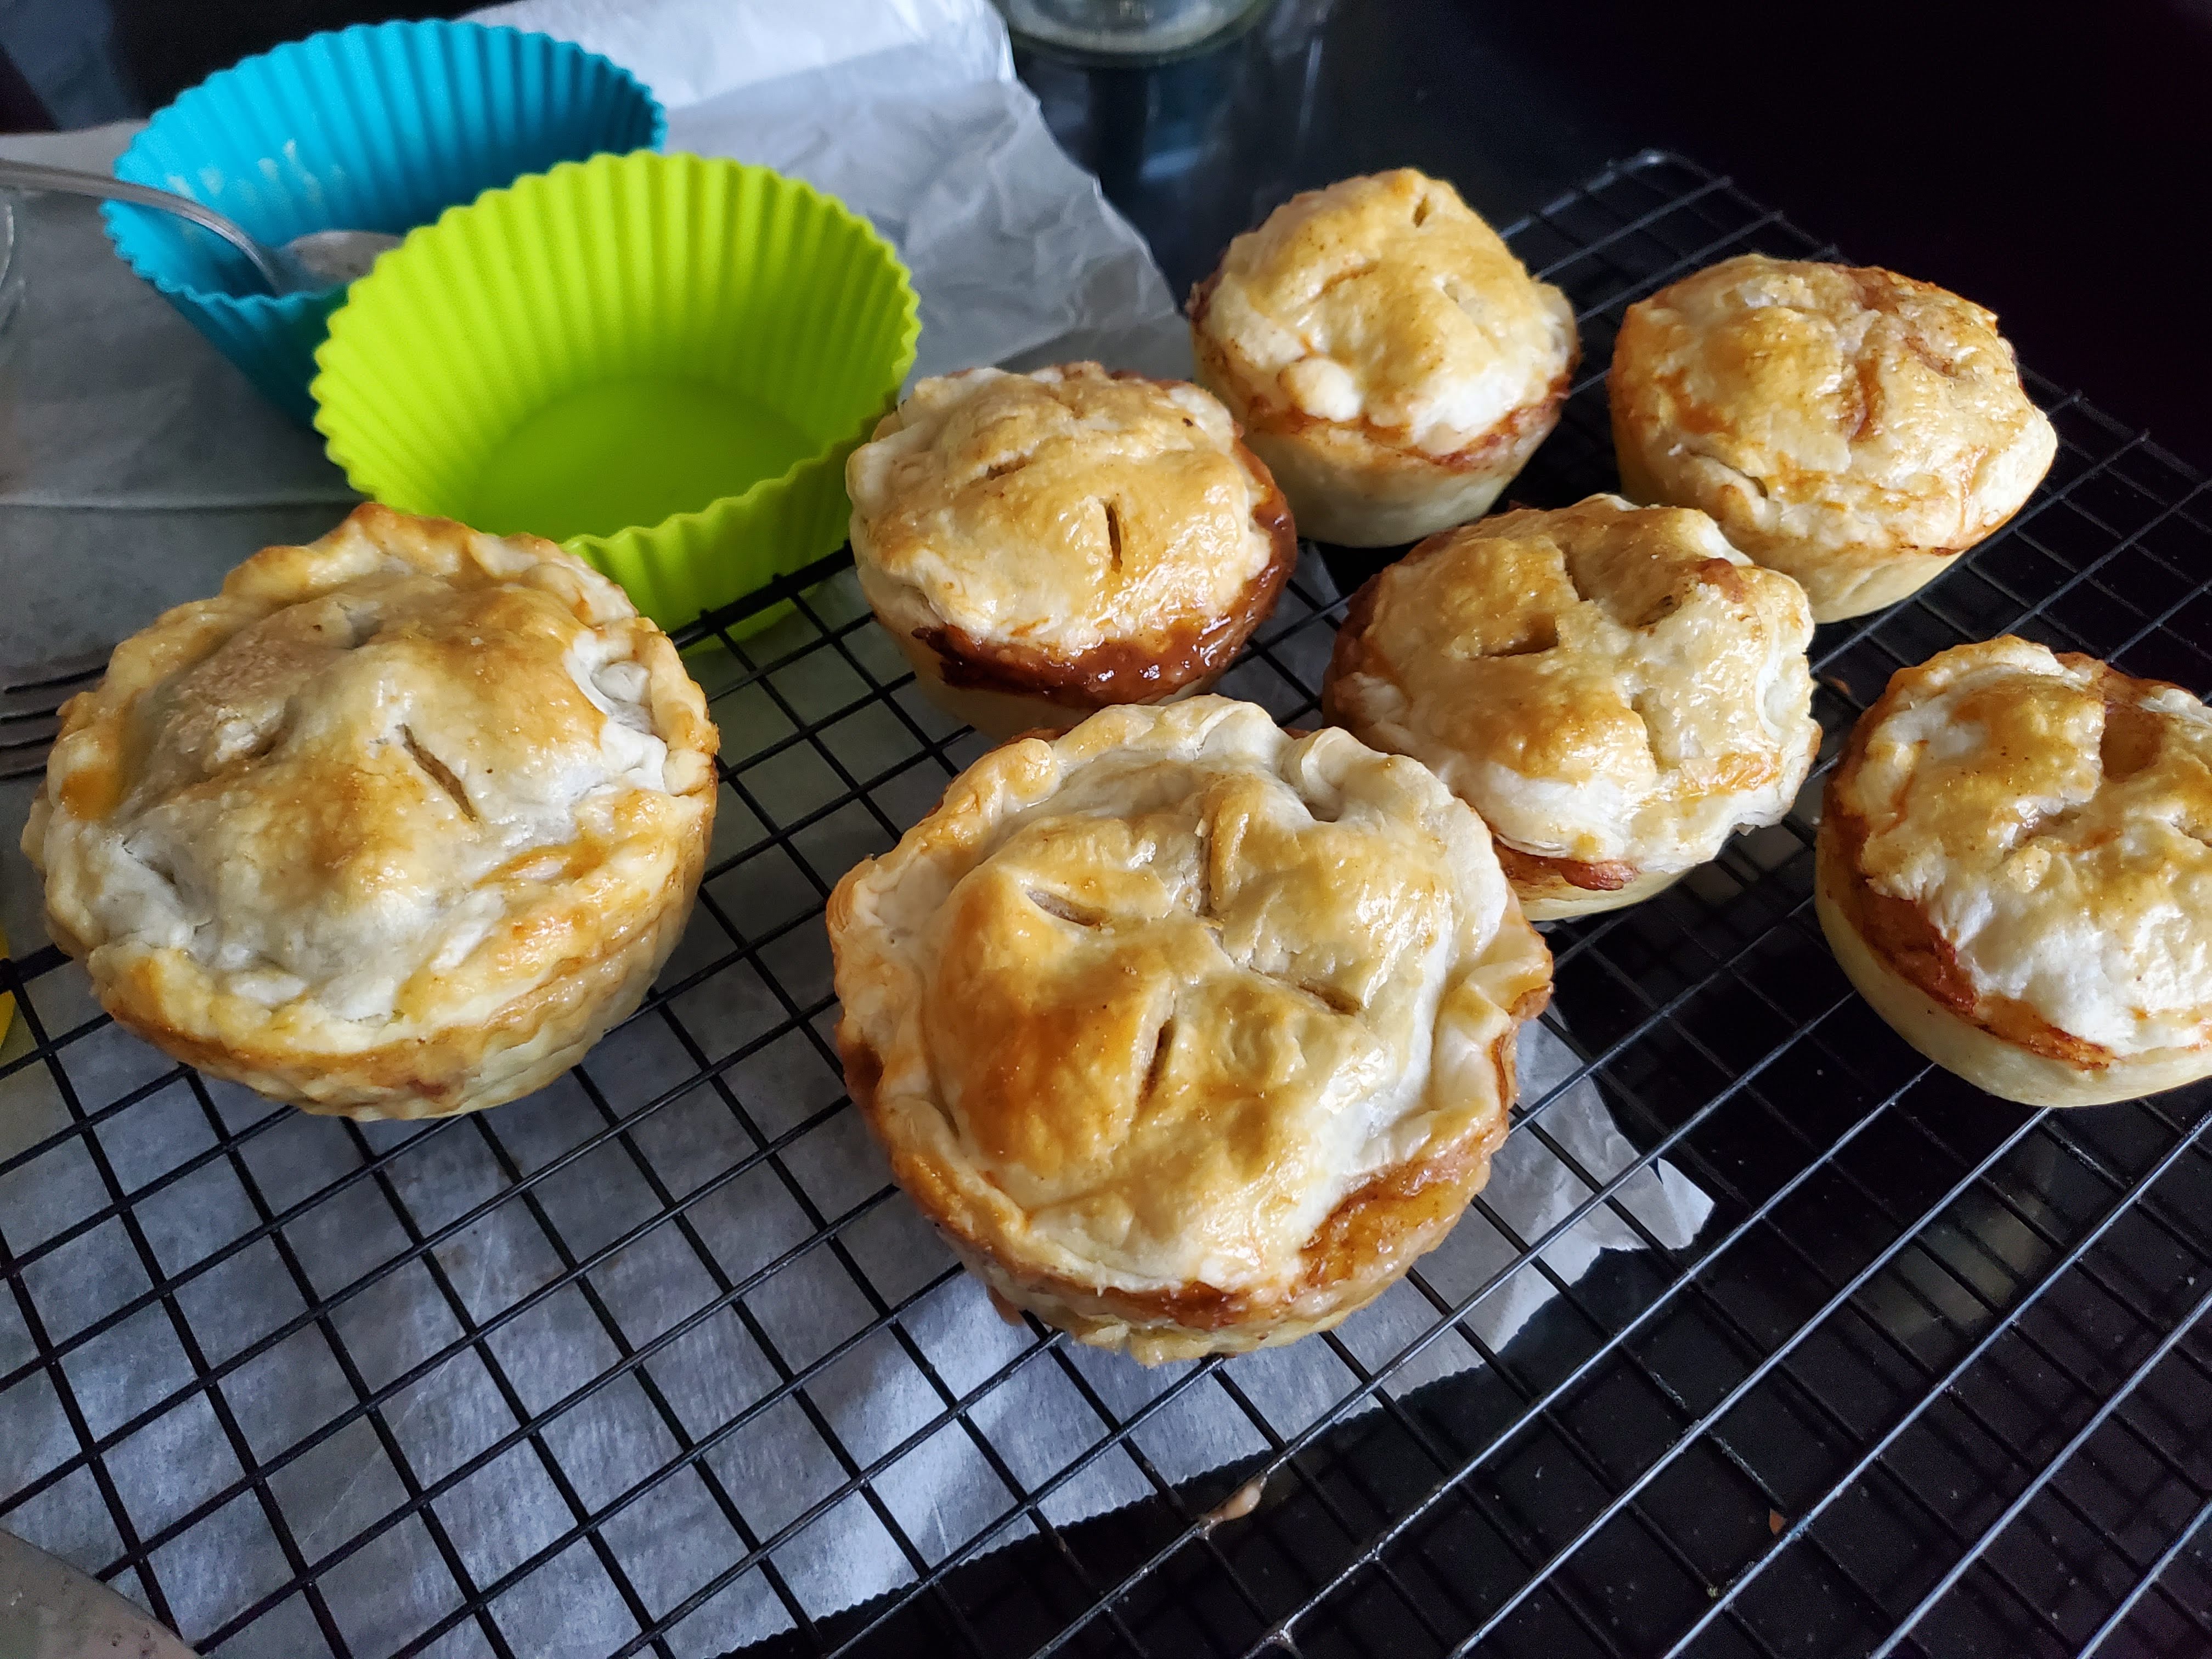
I found the recipe and MM cooked the meat both times. I just assembled them the first time. Second time he did it for the international festival. He used way more black pepper the second time and it gave it a really nice kick. We still want to try a mushroom version, but this was a good start. First time we used rib steak, second time chuck steak with less broth. First time made 6 muffins, 2 texas muffins and 6-5" pies. Second batch made 24 muffin size pies. Recipe adjusted below (original in parens).
6/6/23 Made this on my own with soup meat, using just under 1 kg all in 1 day. Made exactly 6-5" pies. I thought they were fine but MM said not as good.

  • 3 T olive oil
  • 1.5 kg chuck steak, cut into 1 cm cubes
  • 1 onion, diced - brown, yellow, white or shallots (2)
  • 3 garlic cloves, minced
  • 2 T tomato paste
  • 3 c beef broth (4 c)
  • 1 c red wine (dry and dark, not light like pinot noir)
  • 2 bay leaves
  • 1.5 t salt
  • 2 t black pepper*
  • 3 T cornstarch*
  • 4 T water
  • 1 egg yolk, lightly beaten (or whole egg for lighter finish)
  • puff pastry
  • quiche pastry/shortcrust pastry (1 jumbo circle has 4 5" pies worth)
Day Ahead: Beef filling
  1. Heat 1 T olive oil in large pot over high heat. Add layers of beef to sear outside until lightly browned. Remove to bowl and repeat.
  2. Lower heat to medium high and add the remaining olive oil. Cook onion and garlic until translucent (~5 min).
  3. Return beef to pot and all other filling ingredients EXCEPT cornstarch and water. Mix to combine. 
  4. Simmer then lower heat to low/med-low so bubbling super gently. Leave to cook for 2 hours, stirring occasionally. Beef should be very tender.
  5. Mix cornstarch with water to make slurry. Pour into pot and mix. Cook for 5 min until sauce thickens.
  6. Remove from heat to cool. Season with additional salt and pepper.
Assembly
  1. Preheat oven to 180C/350F.
  2. Grease muffin tins, silicone cups or 5" pie plates.
  3. Cut quiche pastry ~1" bigger than tin/cup. Press into pan leaving overhang/thick edge. Fill to brim with filling.
  4. Cut puff pastry to size. Place lid on top of filling and gently press to join the doughs.
  5. Slice 3-5 times from center, widening the slits to ensure they stay open.
  6. Brush with egg wash.
  7. Bake for 20-25 min until dark/deep golden brown.
  8. Allow to rest for a few min before turning out to wire rack.
  9. Serve warm with tomato sauce (aka Australian for ketchup).


Wednesday, August 24, 2022

Single Layer Cake with Fruit

MM doesn't like too cake that much so made a single layer birthday cake. This is easy to do with fresh or frozen fruit. I used frozen peach slices. XBD said there should have been more fruit. There was only a small amount of leftovers that was finished the next day.

  • 8 T (113 g) butter, room temp
  • 3/4 c sugar
  • 1 t baking powder
  • 1/2 t salt
  • 2 eggs, room temp
  • 1 t vanilla
  • optional: 1/4 t almond extract
  • 1 c flour (or mix of almond meal)
  • 1.5-2 c fresh or frozen berries/stone fruit (sliced)
  • 2 T - 1/4 c sugar (depends on tartness of fruit)
  • 1 t cinnamon
  • whipped cream (slagroom/heavy cream 30-36% fat, sugar, vanilla)
  1. Preheat oven to 350F. Grease 8-9" square pan or 9-10" round pan
  2. Beat together the butter, sugar, powder, and salt until smooth.
  3. Beat in eggs, one at a time, scraping the bowl each time.
  4. Stir in extract(s).
  5. Mix in flour to make a stiff smooth batter.
  6. Spread the butter in the greased pan.
  7. Add the fruit and bake.
    1. If using fresh berries, sprinkle on top of batter and sprinkle with sugar and cinnamon. Bake for 35-40 min.
    2. If using frozen fruit, bake the cake batter for 10 min (to set the bottom of the cake). Remove from the oven, sprinkle the fruit evenly, and top with sugar and cinnamon. Continue baking for 40-45 min.
  8. Remove when light golden brown. Cool slightly. Serve with whipped cream.

Sunday, August 14, 2022

Sunshine Wreath aka Citrus Twist

This is my favorite recipe so far from Samantha Seneviratne's cookbook, Joys of Baking. Its warm yellow spiral design and wonderful fragrance can't help but bring a smile to my face.

The first few times I made it, I did it by hand. Truly a labor and I couldn't help add a bunch of flour because it was so gloppy after adding the butter. Now that I have a stand mixer, it's so easy to just let the machine do the work and the butter eventually gets worked in without having to add more flour (or feeling like I'm going to injure my arm from the intense kneading). I even made 2 doughs in the same day (saving one to bake a couple days later).

DBD watched the video on how to make it and caught that you can use the spread on toast as well, and  made sure to save some the last time we made it (in fact, DBD and XBD made the filling together while I lay on the couch). 

8/22/23 Made this for a summer gathering. Still a personal favorite.


Tuesday, February 8, 2022

Blueberry Almond Muffins

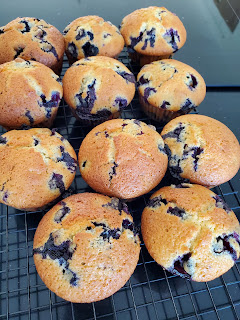
The hint of almond and the sheer number of blueberries are what make these muffins special. Best warm out of the oven.

  • 2 c flour
  • 2 t baking powder
  • 3/4 t salt
  • 1/2 c butter, softened (113 g, or less if using Dutch butter)
  • 1 c sugar
  • 2 eggs
  • 1.5 t vanilla
  • 1/4 t almond extract
  • 1/2 c milk
  • 2.25 c fresh blueberries, washed and dried
  1. In a medium bowl, combine the flour, powder and salt.
  2. In a large bowl, beat the butter and sugar for 2 min.
  3. Add eggs one at a time.
  4. Stir in the extracts.
  5. Alternate adding the flour mixture and milk to make a thick batter.
  6. Gently fold in the blueberries. Do not overmix.
  7. Scoop into paper liners in muffin tin.
  8. Bake at 375/190 for 30 min until lightly golden.
  9. Cool in pan 10 min.
  10. Run knife around edge to remove from muffin tin and cool on wire rack.


Wednesday, February 2, 2022

Soft Coconut Cookies

It's impossible to find semisweet chocolate here so instead of making chocolate chip cookies, I tried a new recipe for soft coconut cookies. I used to make macaroons when I was younger but find them too sweet now. This one was a nice touch of coconut without being overwhelmingly sweet nor chewy. I baked them 3 trays for different lengths and lightly browned looks the best. Made 39 cookies.
To try: One reviewer suggested using just 1 c sugar (instead of both sugars) and juice+zest of one lime.

  • 2.5 c coconut (2 c for toasting, 1/2 c plain)
  • 2.5 c flour (used 2 c Dutch bread flour, 1/2 c German flour)
  • 1 t baking soda
  • 3/4 t salt
  • 185 g butter, room temp (original was 225 g/1 c, but Dutch butter is weird, so reduced it)
  • scant 3/4 c brown sugar (mostly donkere, but with a touch of light)
  • 3/4 c sugar (Dutch fine)
  • 2 eggs
  • 1.5-2 t vanilla
  1. Spread 2 cups of coconut in pan over induction heat 5, stirring constantly until golden brown. Be careful not to burn. Immediately transfer to bowl to cool.
  2. In a medium bowl, combine flour, soda and salt.
  3. In large bowl, beat the butter and sugars for 3 minutes.
  4. Beat in eggs, one at a time.
  5. Stir in vanilla.
  6. Add flour mixture until just combined.
  7. Add toasted coconut and mix until just combined. Do not overmix.
  8. Place plain coconut in bowl (can be chopped up further). Roll dough into small balls and dip one side in coconut.
  9. Place on parchment lined cookie sheet. 
  10. Press down cookies since they will not spread very much in oven (thus, there is no need to refrigerate the dough either). 
  11. Bake for 9-12 min at 175-180C until just beginning to brown at edges (or slightly less). 
  12. Cool on wire rack.
  13. Store in airtight container.

Monday, December 27, 2021

Roast Garlic Bread (with Rosemary)

I didn't have rosemary the first time I made this so it turned out as a delicious garlic bread. The second time I made it was with rosemary but DBD preferred it without. The first time the dough was way too wet - made worse by the oil from the roasted garlic. The second time I put much more flour before adding the garlic...and it was better, but still too wet! The dough was floppy and did not hold it's shape.
  • 1.5 t yeast
  • 1 c warm water
  • 2 t sugar
  • 2 t salt
  • 3 T e.v. olive oil
  • 2.5++ c bread flour
  • [1 T dried rosemary]
  • 1/4 t black pepper
  • 1/2 t oregano
  • 1 head of roasted garlic
  • olive oil, coarse sea salt
  1. Roast garlic well in advance. Roast multiple heads at once for immediate and later use:
    1. Slice a full head of garlic horizontally.
    2. Place both halves on foil, cut side up. Drizzle olive oil generously on cut halves.
    3. Sprinkle each with a pinch of kosher salt (I used regular salt)
    4. Close the halves back together and quickly seal the foil, twisting it to prevent leaks.
    5. Place garlic on baking sheet and roast for 1 hour at 400F/200C or until the garlic is fully soft and aromatic.
    6. Let cool. Open foil and squeeze the cloves out of peel to use. Refrigerate unused cloves for later use in an airtight container.
  2. In a large bowl mix yeast, water, sugar and salt. Let sit for 5-10 min until it foams.
  3. Add in olive oil. Add flour and knead for about 10 min.
  4. Add rosemary, black pepper and oregano. Knead another 5 min. Add in enough flour to have a somewhat stiff dough (you may need to add 1.5 c flour!).
  5. Gently knead in the roasted garlic. The dough could be a bit sticky but manageable.
  6. Place dough in well greased bowl, oiling all surfaces of dough. Tightly cover in cling wrap and let rise until doubled, about 1 hour (maybe up to 2).
  7. Punch down dough.
  8. Shape into rounded loaf.
  9. Using sharp knife, cut criss cross slits on top.
  10. Place on greased baking sheet. Cover with a large bowl. Let rise until doubled, about 1 hour.
  11. Gently brush with olive oil and sprinkle with sea salt (I used regular salt and would have preferred a milder coarser salt), and optionally a bit more rosemary.
  12. Bake at 375/190 for 25-30 min. Splash water on loaf during middle of baking (or bake with tray of water).
  13. Increase temperature to 425 and spray again. Bake until top is a nice golden brown.
  14. Let rest for at least 5 min before slicing.

Sunday, December 26, 2021

Vietnamese Style Bun (Noodles) with Pork

There aren't many Asian options here so I need to start exploring home cooking some favorite dishes. Starting with Vietnamese bun. I meant to buy pre-made spring rolls but I forgot. I didn't have any pickled daikon so used Chinese pickled radishes instead. Both BDs liked the meat.
2/2/22 Used the frozen marinated pork leftovers to make this again. This time with carrots, cucumber, lettuce, sprouts, mint and basil over pad thai noodles. Broiled the pork at 240C for 3-4 min each side.
1/8/24 Only had 1.5 cloves for marinade and omitted garlic from dipping sauce. Shredded old carrots and they went brown quickly. BDs devoured.
3/24 Doubled recipe for meat and froze more than half for ease of preparation next time. But forgot to cook the frozen spring rolls!

  • Marinade
    • 3 T shallots, minced
    • 1.5 T garlic, minced
    • 1/4 c sugar (or scant)
    • 1 T fish sauce
    • 1/2 T thick soy sauce (used regular)
    • 1/2 T pepper
    • 3 T neutral cooking oil
  • Pork Shoulder (1.5-2 lbs), sliced in 1/8" pieces
  • bun noodles (~200 g for 4 people, or double for hungry adults)
  • Dipping Sauce
    • 6 T water
    • 2 T sugar
    • ~1.5 T fresh lime juice
    • ~2 T fish sauce
    • 1 cl garlic, minced
    • optional: chili flakes
  • Garnish: carrots, cucumber, crushed peanuts, pickled daikon, chopped lettuce, mint, coriander, basil, spring roll, bean sprouts
  1. Mix marinade ingredients until sugar dissolves. Add pork. Leave in fridge overnight for best results, otherwise at minimum 1 hour. (If making a double batch, transfer half to freezer for use another day.)
  2. Preheat the oven to 375F/190C.
  3. Make the dipping sauce.
    1. Put water in small bowl. Add sugar and stir until dissolved.
    2. Add lime juice to desired taste (aim for limeade).
    3. Add fish sauce - taste - it should be strong since it will be muted by noodles.
    4. Stir in optional garlic and chili if using.
  4. Lay pork on foil lined tray and bake for 10 minutes until pork is about 80% cooked.
  5. Set to broiler, at least 200C until browned, flip and brown other side. Watch closely to prevent burning!
  6. Cook the noodles according to the instructions (ie boil for 8 minutes). Distribute to bowls.
  7. Prepare the garnish.
  8. Serve: Spoon desired amount of dipping sauce over noodles, stir. Top with garnish. Enjoy!


Wednesday, December 22, 2021

Ginger Molasses Cookies - soft and chewy

Despite the weird Dutch ingredients, these actually turned out soft and chewy even though they spread flat. In North America this might make a thicker cookie as it's meant to be. A bit too much clove for my taste, but otherwise good. This makes a very large amount of cookies, which is fine if you have people to share with. If not, might be good to cut the recipe in half. Mine all spread very quickly in the baking process but rose, and then deflated when taken out of the oven. I tried adding more flour to reduce spread but it was hard to mix in once it was chilled.

  • 1.5 c butter, room temperature
  • 1 c sugar (Dutch fine)
  • 1 c brown sugar (Dutch basterd suiker - lichte and donkere mixed)
  • 1/2 c unsulfured molasses
  • 2 eggs, room temperature
  • 4.5 c (639 g) flour, or more
  • 4 t baking soda (yes this is a lot)
  • 1 T ginger
  • 2 t cinnamon
  • 1/2 t cloves (reduced from 1 t)
  • 1 t salt
  • dip: sugar (Dutch regular, bigger than fijn)
  1. In a medium bowl sift the flour, soda, spices and salt.
  2. In a large bowl cream the butter and sugars.
  3. Mix in the eggs one at a time and then the molasses.
  4. Gradually add in the flour mixture until it is combined. If it is too sticky, add more flour.
  5. Cover tightly and rest in fridge for at least 2 hours.
  6. Preheat oven to 350F/175C. 
  7. Roll into small balls, about 1" diameter. Roll in sugar and place on parchment lined baking tray. Chill until oven is ready.
  8. Bake for 8-10 min until the cookies start to crack on top (mine never cracked, so just baked before they were fully cooked). Cool on tray for 4-5 min, then transfer to rack. (Or if overbaked, transfer right away).
  9. Can be kept on counter in sealed container for 4 days or frozen for 3 months.

Thursday, July 29, 2021

Peach Cobbler

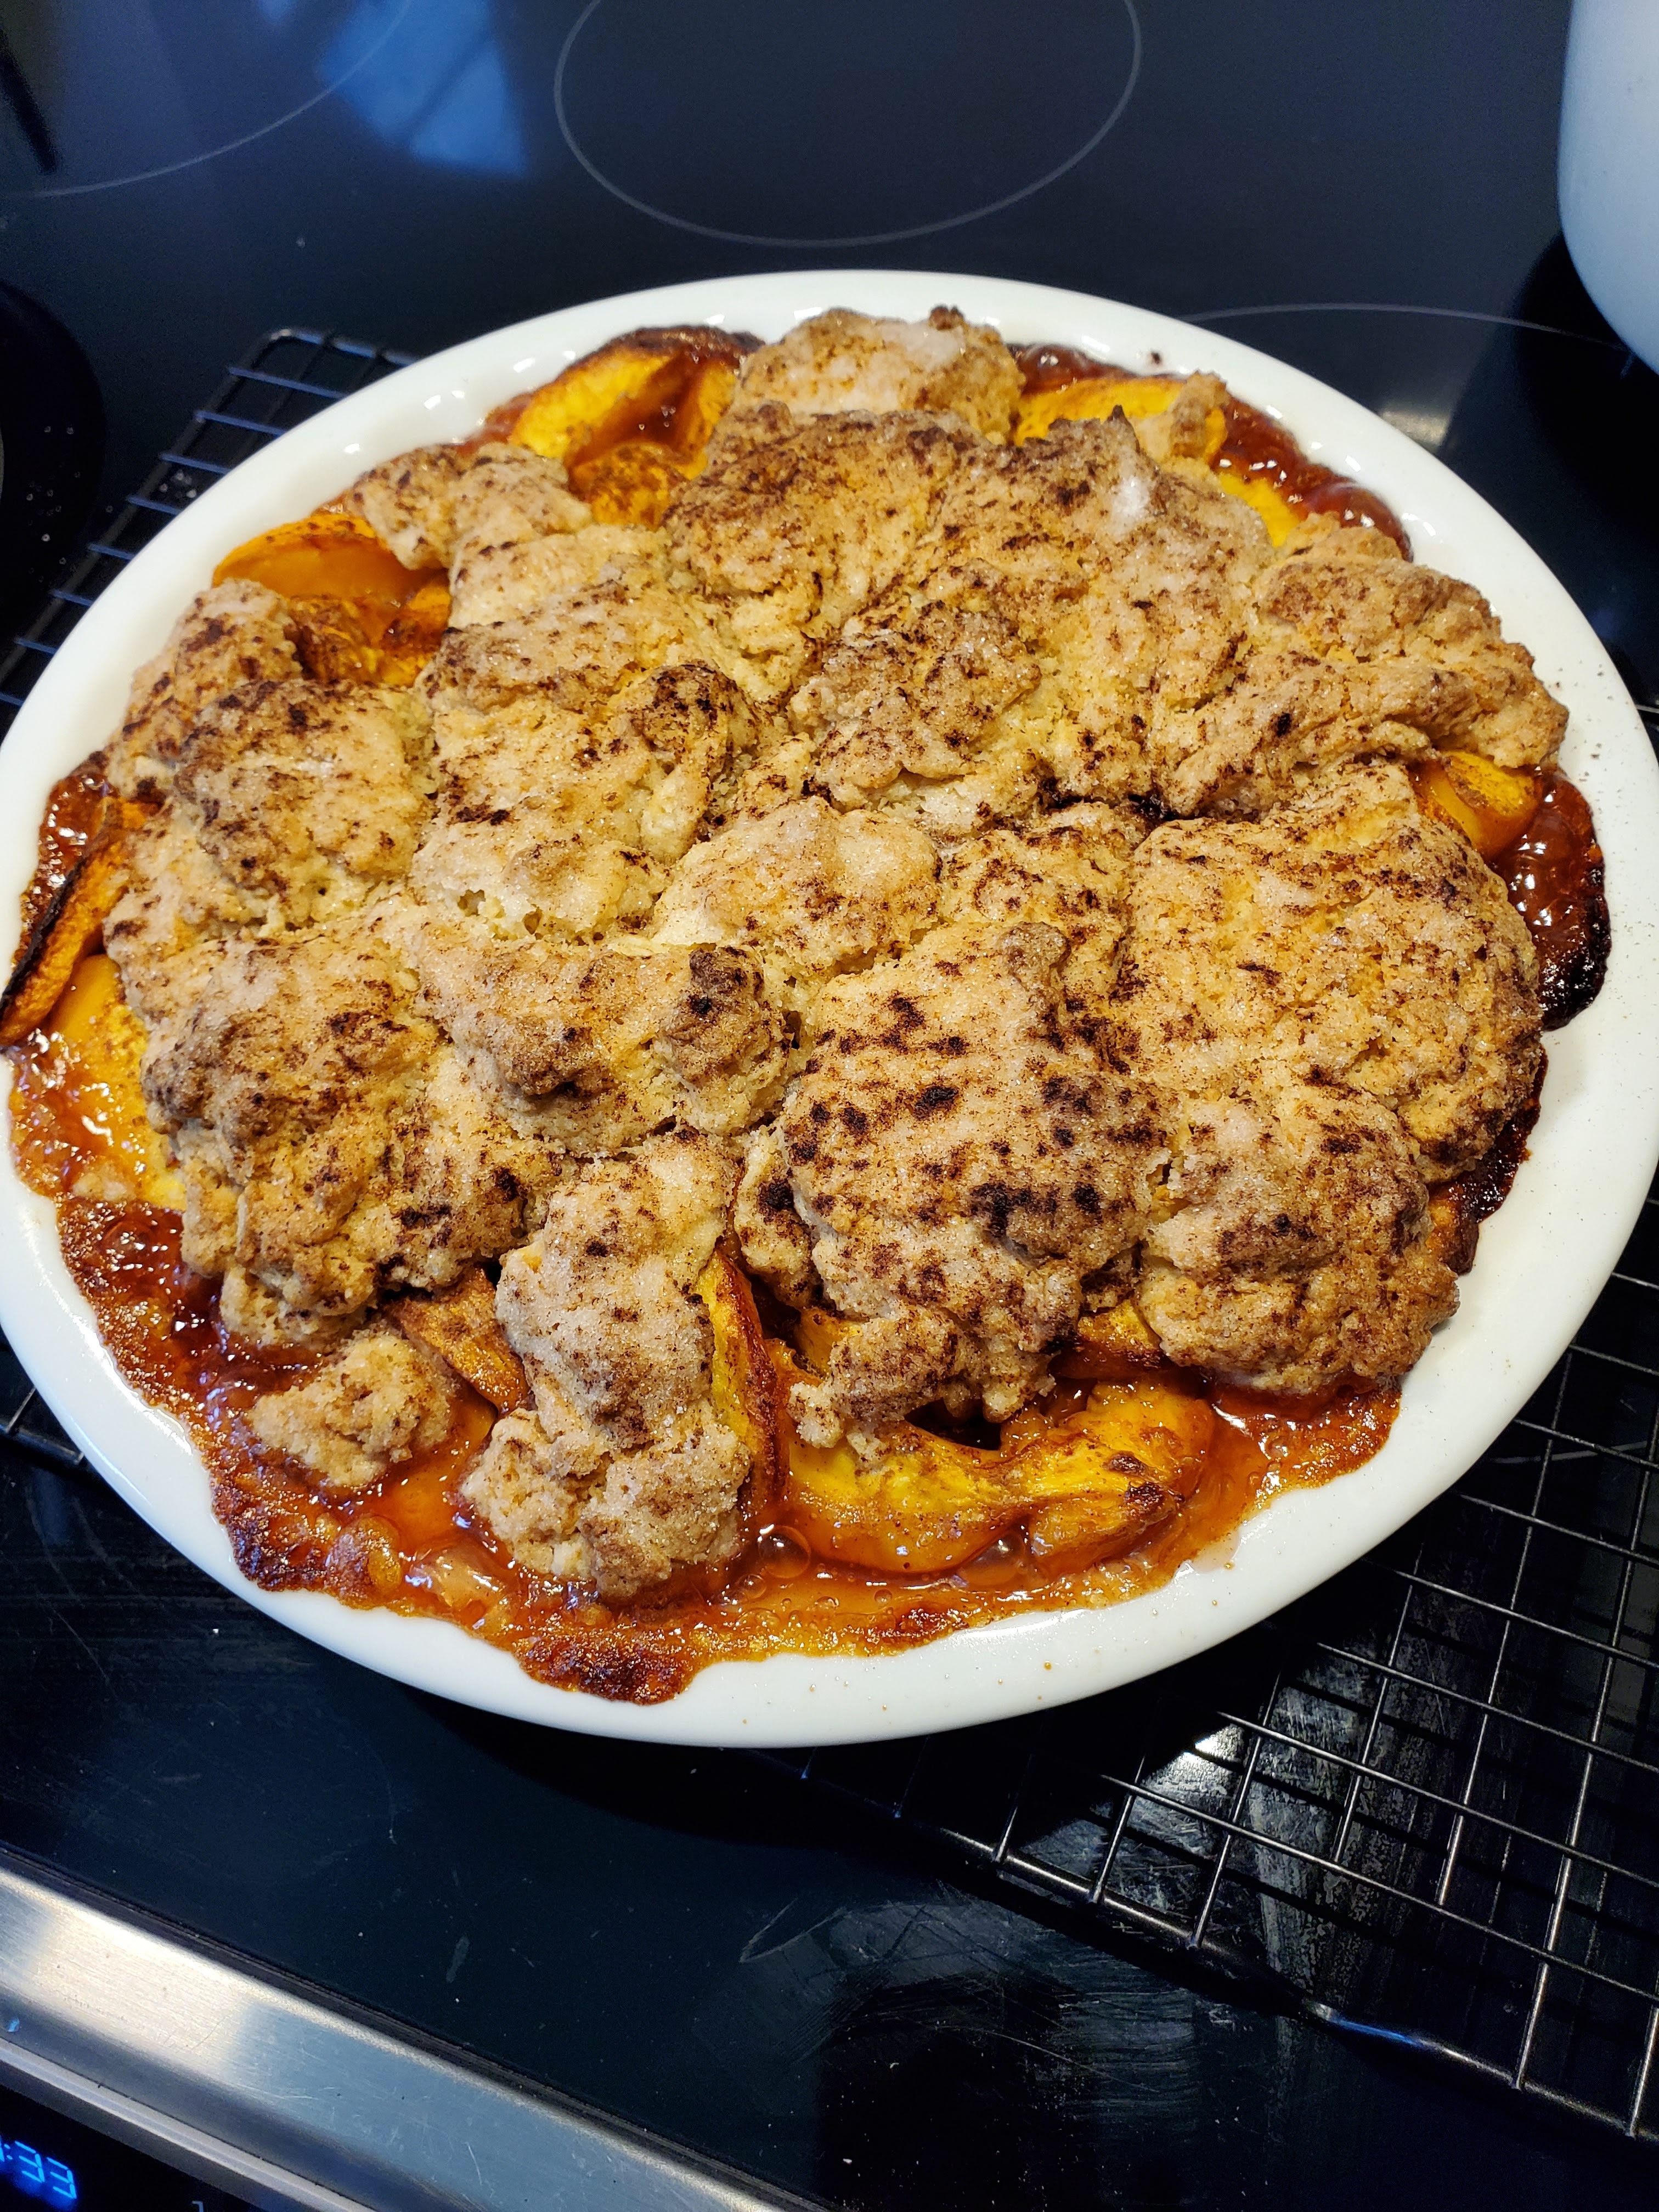
I had a pile of ripe peaches to use up so found this recipe to use. Increased the butter and cornstarch from the original and used a pie plate instead of 8x8 dish. Came out delicious!
8/13/21 Used 12 peaches and increased sugars to 1/3 c each, 3 T cornstarch, and did 1.5 the cobbler topping in a 9x13 dish. Delicious for a big party.
6/5/22 Continues to be a raging hit at parties. Made in a 9x13 dish again as above. Used mix of peaches and nectarines. Could use less sugar if fruit is ripe.
8/19/23 Bought 8 ripe peaches from the fruit shop to bring this to J's dinner with A+T.

  • 8 ripe peaches
  • 1/4 c sugar
  • 1/4 c brown sugar
  • 2 T cornstarch
  • 1/4 t cinnamon
  • 1/8 t nutmeg
  • 1 t lemon juice
  • 1 c flour
  • 1/4 c sugar
  • 1/4 c brown sugar
  • 1 t baking powder
  • 1/2 t salt
  • 7 T butter, chilled
  • 1/4 c boiling water
  • topping: 3 T sugar, 1 t cinnamon
  1. Preheat oven to 425F/220C.
  2. Boil a small pot of water. Fill a bowl with ice water.
  3. Dip peaches in boiling water for 1 minute. Immediately place in ice water. Do this in batches, as size of pan allows.
  4. Peel peaches (the skin should slide right off because of previous steps). Slice into large bowl.
  5. Add 1/4 c sugar, 1/4 c brown sugar, cornstarch, cinnamon, nutmeg, lemon juice. Mix well. Pour into pie plate or 8x8 dish. Bake for 10 min.
  6. While baking, combine flour, sugars, baking powder and salt in a large bowl. Cut chilled butter into mixture. Mix with pastry blender or fingers until coarse. Stir in boiling water just until combined.
  7. Drop spoonfuls of the dough onto the hot peaches.
  8. Sprinkle with topping ingredients.
  9. Bake until golden, about 30 min.


Peach Pie Filling ***
March 2023 Made this pie filling for mini pies, but it was too sweet and not enough cinnamon. Would recommend using the above ratios instead. 1 peach per 5" mini pie pan.
  • 1 large can peach halves (4 peaches), 1/4" slices (or 4 fresh ripe)
  • scant 1/2 t vanilla
  • 1 1/4 T lemon juice
  • 2.5 T cornstarch
  • 1/3 c sugar
  • 1/3 c brown sugar
  • 1/8 t cinnamon
  • 1/2 c water
  1. In a medium saucepan, combine everything but the peaches. Whisk until smooth.
  2. Bring to boil over medium heat, stirring frequently. Let thicken for 2-3 min.
  3. Add the peaches and cook for 3 minutes (canned) - 7 minutes (fresh) to soften slightly.
  4. Let cool and then use as pie filling.


Monday, January 25, 2021

Chocolate Pear Galette des Rois

Someone in the neighborhood was selling homemade galette des rois, which I'd never heard of. They looked so beautiful I wanted to try it myself. Plus there was the fun aspect of finding out who would be king for a day. I misread the instructions and missed 1/3 of the nuts in the mixture and the filling oozed out of the crust and came out boiling in butter. However, despite the ugly appearance it tasted delicious and I would make it again with adjustments (following the right ratio as well as changing the baking temperature). It was very fun to see who would be king of the day - it came down to the 11th slice out of 11 to find out! XBD and DBD each made a crown for the winner, who proudly wore it on the 3rd and 4th days.

I used 2 different recipes - 1 for the puff pastry and 1 for the filling. They each had different baking temperatures - next time I would follow the higher temperature as advised by the pastry recipe. The higher temperature is supposed to help the butter steam and make it puff up. The lower temperature just melts the butter slowly and doesn't puff up.

Puff Pastry

  • 2 c flour
  • 1 t salt
  • 1.25 c butter (2.5 sticks) - cold
  • 1/2 c - 3/4 c cold water

Filling

  • 2 pears, peeled
  • tiny amount of coconut oil
  • 60 g of dark chocolate (70%+)
  • 150 g of almond flour or cashew meal
  • 150g butter (or replace up to 100 g applesauce)
  • 2 eggs + 1 egg for topping
  1. Prepare the pastry: 
    1. In a large bowl, combine the flour and salt.
    2. Slice in the butter in 1/4" chunks, coating with flour.
    3. Stir in the water minimally until a thick dough forms. Do not overmix - just until the flour comes together. The butter should still be in chunks.
    4. Shape into a ball and flatten. Wrap in plastic wrap and chill for at least 1 hour in the fridge (or 30 min in the freezer).
  2. Form layers in the pastry:
    1. Place dough on floured surface. Roll into rectangle shape.
    2. Fold in thirds. Turn 90 degrees, roll and fold in thirds again.
    3. Repeat 4 times.
    4. Wrap the dough in plastic wrap and chill overnight (or at minimum 2 hours)
  3. Make the filling:
    1. Slice each pear into 8-12 pieces.
    2. Heat the coconut oil in a pan and saute the pear for several minutes.
    3. Add a small amount of sugar to caramelise them, cooking additional minutes.
    4. Set aside.
    5. In a large bowl, combine the sugar and butter (and optional applesauce).
    6. Add the almond/cashew meal and 2 eggs, mixing until combined.
  4. Assemble the galette:
    1. Divide the pastry into 2 pieces (slightly uneven is ok). Put one back in the fridge.
    2. Roll one piece into a circle. Place on parchment paper on baking sheet.
    3. Spread the filling in the middle, leaving 1.5 inches clear around the edge.
    4. Place a whole almond near the filling edge.
    5. Place pears on top.
    6. Sprinkle with the chocolate chunks. Place in fridge.
    7. Take out the other half of the pastry and roll into a circle.
    8. take out the bottom and water the edge lightly to help the pastry stick. Place the second half on top and seal the edges, to close it up firmly. Press down on the edges with a fork to ensure it's fully closed.
    9. Beat the last egg and brush on top. Use a sharp knife to score a decorative pattern in the pastry. Place in fridge.
  5. Bake the galette:
    1. Original recipe calls for baking 20-30 min at 350F. However, I would instead try:
    2. Preheat oven to 400F. 
    3. Take the prepared tray straight from the fridge and into the preheated oven. Bake for 10 min at 400 and then reduce heat to 375 until done.
    4. Cool on wire rack. 
    5. Serve immediately and save leftovers on the counter for a day, or in the fridge for a couple days. Whoever gets the almond is king for a day!